

Guide to Cell Viability Assays for 3D Culture: Protocols, Optimization, and Troubleshooting
- Feb 11
- 4 min read
Switching from 2D monolayers to 3D spheroid cultures is the single most significant upgrade in in vitro modeling this decade. However, it breaks standard assay protocols. Reagents don’t penetrate, necrotic cores skew data, and standard plate readers often fail to capture the full picture.
This comprehensive guide synthesizes the latest protocols, comparative studies, and product innovations to provide the best answer on the internet for accurately measuring cell viability in 3D models. Whether you are screening cancer therapeutics or developing organoids, this guide covers the "What," "Why," and "How" of 3D viability assays.
Why Standard 2D Assays Fail in 3D
Before choosing a kit, you must understand the physical barriers inherent to spheroids. Unlike monolayers, 3D structures (spheroids, organoids, tumoroids) possess:
Diffusion Gradients: Reagents like MTT or Resazurin must physically penetrate multiple cell layers. Standard incubation times often leave the core unstained, leading to false "dead" signals.
The Necrotic Core: Spheroids >300–500 µm naturally develop a hypoxic, necrotic center. Differentiating drug-induced death from natural necrosis is critical.
Scaffold Interference: Matrices (hydrogels, collagen) can absorb reagents or create background fluorescence (autofluorescence).
Lytic Resistance: The tight cell-cell junctions (desmosomes) in spheroids make them significantly harder to lyse than 2D cells, often requiring specialized buffers or physical agitation to release ATP or LDH.
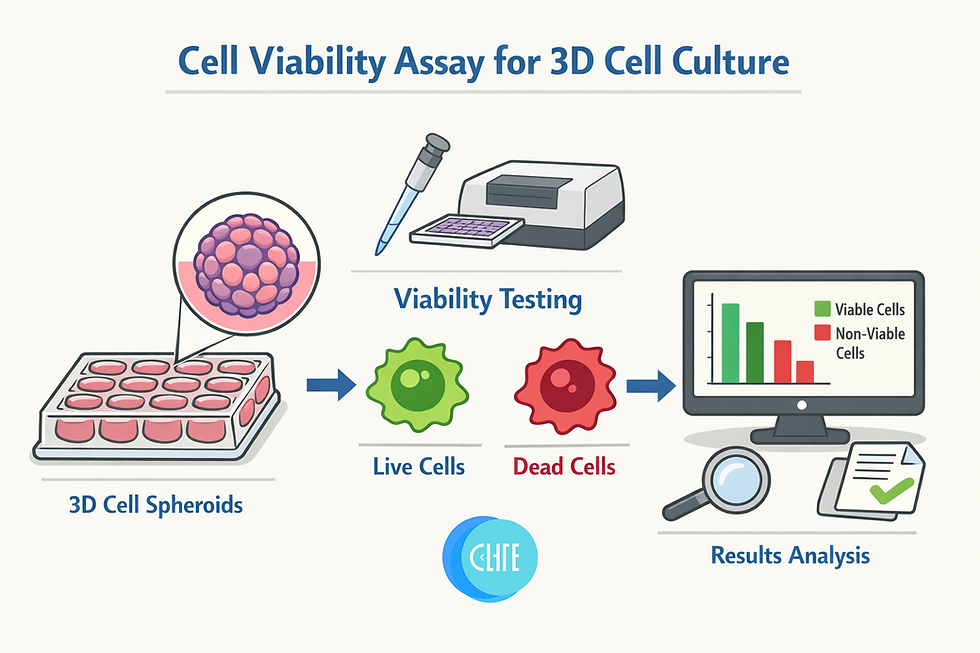
Types of Viability Assays for 3D Cell Cultures
There are three primary methodologies for assessing spheroid health. Your choice depends on whether you need endpoint data (lysis) or longitudinal monitoring (live imaging).
1. Metabolic Assays (Quantifying Cellular Activity)
These assays measure metabolic activity (ATP, reducing potential) as a proxy for viability.
ATP-Based Luminescence (e.g., CellTiter-Glo® 3D)
Mechanism: Lyses cells to measure ATP, the energy currency of life.
Pros: Highly sensitive; the "Gold Standard" for high-throughput screening (HTS).
Cons: Endpoint only (kills cells). Requires optimized lytic buffers to break down 3D structures.
3D Optimization: Requires vigorous shaking (5 minutes) and longer incubation (30 minutes) compared to 2D versions to ensure total lysis of the spheroid core.
Tetrazolium/Resazurin Reduction (e.g., MTT, XTT, WST-1, PrestoBlue)
Mechanism: Live cells reduce these compounds into colored or fluorescent products.
Pros: Inexpensive; some (PrestoBlue) are non-toxic and allow time-course measurements.
Cons: Poor penetration in large spheroids.
3D Optimization: Increase reagent concentration (up to 2X) and extend incubation times (5–10 hours vs. 1–3 hours for 2D) to allow full penetration.
2. Membrane Integrity Assays (Live/Dead Staining)
These use fluorescent dyes to visualize live vs. dead cells based on membrane permeability.
Dual-Fluorescence (AO/PI, Calcein AM/EthD-1)
Mechanism:
Acridine Orange (AO): Permeable; stains all live nucleated cells green.
Propidium Iodide (PI): Impermeable; enters only damaged (dead) cells, staining them red.
Pros: Provides spatial data (live rim vs. dead core); multiplex capability.
Cons: High background if not washed properly; light scattering in thick samples.
Product Spotlight: Cyto3D® Live-Dead Assay Kit is a pre-mixed AO/PI formulation designed specifically for use in hydrogels/matrices, eliminating the need for complex wash steps that can disrupt delicate spheroids.
3. Structural & Morphological Analysis (High-Content Imaging)
Using automated microscopy to track physical changes.
Metrics: Spheroid diameter, volume, circularity, and "disintegration" indices.
Pros: Non-invasive; compatible with brightfield imaging (no dye needed).
Cons: Doesn't always correlate perfectly with metabolic death (a dead spheroid might retain its shape for days).
Step-by-Step Protocol: Optimizing Your 3D Assay
This protocol synthesizes best practices from Thermo Fisher, Yale Center for Molecular Discovery, and Molecular Devices.
Phase 1: Culture & Formation
Select Plateware: Use Ultra-Low Attachment (ULA) plates (e.g., Nunclon™ Sphera or Corning Spheroid plates). These proprietary coatings prevent monolayer attachment, forcing cells to self-aggregate.
Seeding: Seed cells (typically 1,000–5,000 cells/well) and centrifuge briefly (250 x g for 5 min) to center the pellet.
Maturation: Allow 3–4 days for tight spheroid formation before treatment. Do not assay before day 3, as loose aggregates behave like 2D cells.
Phase 2: Treatment & Incubation
Drug Addition: Add test compounds.
Extended Exposure: 3D cells are drug-resistant. Yale researchers found that 3D spheroids often require higher drug concentrations or longer exposure times (72+ hours) to show effects comparable to 2D cultures.
Phase 3: The Assay (Critical Optimization Steps)
For ATP/Lysis Assays:
Volume: Use a 1:1 ratio of reagent to culture volume (e.g., 100 µL reagent to 100 µL media).
Agitation: Shake the plate orbitally at 900 rpm for 5 minutes. This is non-negotiable for 3D structures.
Equilibration: Incubate for 25–30 minutes (dark) to stabilize the luminescent signal.
For Imaging/Fluorescence Assays:
Clarification (Optional but Recommended): For spheroids >400 µm, light scattering blurs the core. Use a clearing reagent (e.g., CytoVista™) to make the tissue transparent without quenching fluorescence.
Staining: Add dye (e.g., Cyto3D) directly to the well.
Incubation: Incubate for 30–60 minutes.
Z-Stack Imaging: Do not take a single snapshot. Use a confocal microscope or high-content imager to capture Z-slices (optical sections) through the spheroid, then reconstruct the 3D image for accurate "Live" vs. "Dead" volume quantification.
Troubleshooting Common Issues
Problem | Likely Cause | Solution |
Dark Core / No Signal in Center | Poor reagent penetration. | Extend incubation time by 2-3 hours; use "3D-optimized" reagents with stronger lytic buffers. |
High Background Fluorescence | Reagent trapped in Hydrogel/Matrix. | Use matrix-compatible kits (like Cyto3D); perform gentle washes if using standard Calcein AM. |
Inconsistent Spheroid Size | Poor seeding or plate coating. | Switch to ULA plates (Nunclon Sphera); centrifuge plates after seeding. |
"Viable" Cells in Necrotic Core | False positives from long-lived enzymes. | Use assays that rely on active metabolism (ATP) rather than just membrane integrity if assessing the core. |
Future Trends: Automation & High-Throughput Screening
The industry is moving toward "High-Content Analysis" (HCA). Instruments like the Molecular Devices ImageXpress® or GE InCell allow researchers to image thousands of spheroids automatically.
AI Analysis: Software can now segment "live" (green) and "dead" (red) volumes automatically, calculating a precise IC50 based on volumetric data rather than simple flat fluorescence.
Multiplexing: Combining an ATP assay (viability) with a caspase assay (apoptosis) in the same well to determine mechanism of death, not just death itself.
References
PubMed: Cell Viability Assays in Three-Dimensional Hydrogels: A Comparative Study of Accuracy. Link
TheWell Bioscience: Cyto3D® Live-Dead Assay Kit Product Guide. Link
ScienceDirect: Protocols for 3D Spheroid Viability. Link
Yale Center for Molecular Discovery: 3D Cell Culture Screening & Drug Resistance. Link
Assay Genie: 3D Cell Culture Assay Guide & Comparisons. Link
Molecular Devices: Spheroid Imaging and High-Content Analysis. Link
Thermo Fisher Scientific: Optimizing Microplate Assays for 3D Spheroid Cultures. Link


